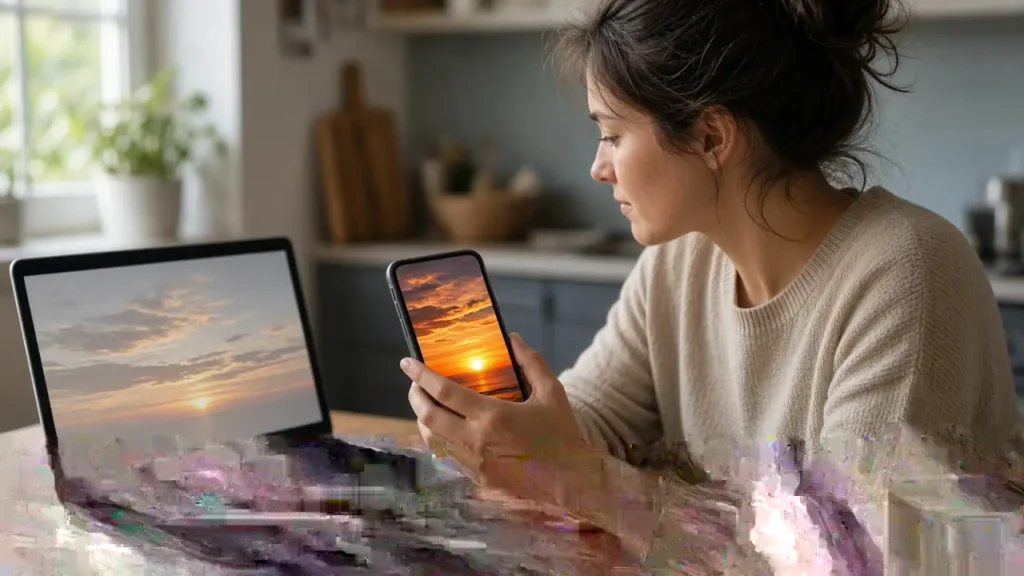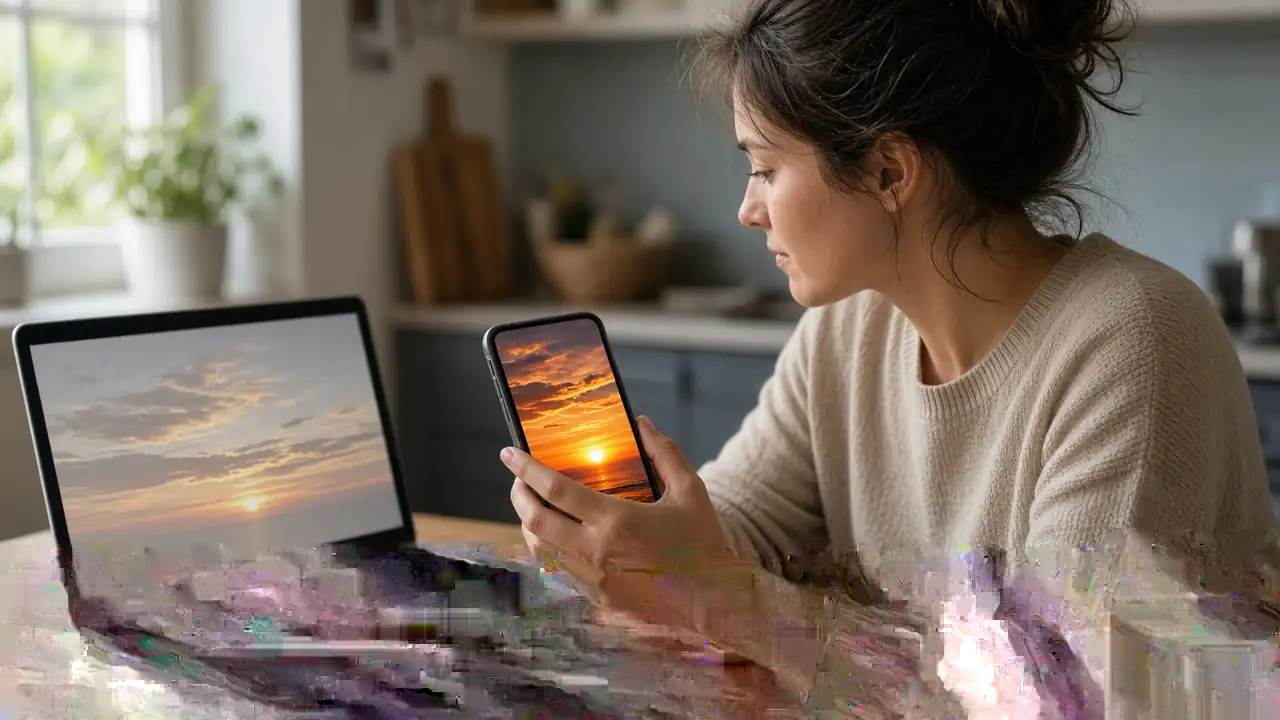

You shot the sunset on your phone. On the phone it is rich. Orange sits in the clouds, the water is dark blue, and the sun is a small hot disc instead of a white blob. You send the file to a laptop, or you drop it into an editor and export, or you upload it. The same sunset comes back pale. The orange is beige. The shadows are a flat gray, or they have slammed shut so the foreground is a silhouette.
The first instinct is to blame the export settings and push the bitrate up. Bitrate is rarely the reason a picture changes color. A tiny file can still be the right color. A huge file can still be the wrong color. What changed is usually the description of the color, or the screen that is trying to interpret it.
Two different failures get lumped together in forum posts. One is a dark grade: you, or the camera’s own processing, actually made the picture darker, and a bright phone screen hid it. The other is a tag the next player never understood, so it displayed high-range pixels as if they were an ordinary video. They look similar in a screenshot. They are repaired in opposite ways. Crushing the shadows will not fix a missing tag. Adding a tag will not fix a grade that was already too dark.
The three words people mix up
SDR means standard dynamic range. It is the ordinary video most laptops, browsers, messaging apps, and older TVs expect. The common label for that color, for uploads to YouTube, is BT.709. YouTube’s encoding guide recommends BT.709 for the transfer, the primaries, and the matrix on an SDR upload. If a file leaves those fields blank, YouTube says it assumes BT.709.
HDR means high dynamic range. The file is allowed to hold brighter highlights and deeper shadows than SDR, and it needs extra metadata so a screen knows how to show them. On a phone, that often shows up as a more vivid camera roll than the file you get after a “simple” convert.
A color tag is not the picture. It is a note in the file that says which rules the pixels follow. Primaries say which red, green, and blue the camera meant. Transfer, sometimes called the gamma or the EOTF, says how those numbers map to brightness. Matrix says how color was stored in the file. If the note is missing, or it describes a different picture than the one you encoded, the player guesses. The guess is what people call washed out, neon, or crushed.
What the phone is often saving
Many recent phones can record HDR video without making a fuss about it. On a lot of iPhones, HDR video stays on until someone turns it off in the Camera settings. The file is often HEVC, 10-bit, in a MOV, with Dolby Vision or HLG metadata that the phone’s own player knows how to tone-map. Android phones vary by brand. Some write a 10-bit HDR clip. Some write an ordinary 8-bit SDR clip and only use “HDR” as a still-photo feature. The camera roll is a bad witness either way, because it is showing you the phone’s interpretation, not a neutral one.
That is why the clip can look correct on the device that shot it and wrong everywhere else. The phone is applying a map. The laptop player may be ignoring the map, or applying a different one, or showing the raw numbers as if they were already SDR.
Why the same file looks different on three screens
Play the original on the phone. Then play that same original, not an export, on the laptop where the client will watch it. Then play it in the browser or the app you actually deliver through. You are not checking “quality.” You are checking who is tone-mapping.
A phone screen is small, bright, and often set to crank saturation. A laptop in a bright kitchen, with HDR turned off in the system settings, will show the same pixels differently even when the file is perfect. A TV with HDR enabled may look closer to the phone. A TV with HDR disabled may look like the laptop.
QuickTime, the Films and TV app, VLC, Chrome, and a phone gallery do not share one color policy. One of them may read Dolby Vision and tone-map it. Another may see HEVC and play the base layer with no map, which is a common way to get a gray, hazy image. A third may expand full-range pixels into a limited-range player and crush the blacks. If only one app looks wrong, fix the playback path before you regrade the picture.
This is also why a screenshot of the problem is slippery. A screenshot is a new SDR image of a screen. It can prove that two windows on the same computer disagree. It cannot prove what the file contains.
A dark grade and a missing map are different bugs
Watch a face, a white shirt, and a bright sky. Those three spots tell you which bug you have.
If the face is a normal skin tone, the shirt is white, and only the sky is a flat white disc, you clipped the highlights. The rest of the picture may be fine. More bitrate will not put cloud detail back. You needed a softer exposure, or an HDR capture that you then mapped down on purpose.
If the face, the shirt, and the sky are all pale and milky, and the picture looks better on the phone than in every desktop player, the file is probably still HDR and the player is not mapping it. The pixels are not “low quality.” They are being read with the wrong curve. Washing the contrast out further in an editor will make the phone version worse and the laptop version only accidentally better.
If the face is muddy, the shirt is gray, and the shadows have no detail on the phone as well as on the laptop, the grade or the exposure really is dark. A tag will not lift it. You need to brighten a copy, carefully, and then watch that copy on the duller screen. The phone will forgive a dark grade. The laptop will not.
The white shirt test
Put a white shirt, a sheet of paper, or a sunlit wall in frame for two seconds when you can. It does not have to be a formal chart. After every export, look at that patch on the phone and on the laptop.
If it stays white on both, you are close. If it is white on the phone and gray on the laptop, you are looking at a mapping problem. If it is gray on both, you crushed it in the grade or the convert, and you should fix the picture, not the metadata. If it turns slightly pink or green on only one screen, you are looking at a screen calibration problem, and no export setting will make that laptop honest.
The metadata mistake
YouTube’s encoding guide describes what happens when the note in the file does not match a normal SDR video. Unsupported color is converted to BT.709 by mapping pixel values. If the primaries need a high bit depth and the file does not have a supported HDR transfer, YouTube’s example is BT.2020, and they convert that to BT.709 at 8-bit to avoid banding. They also convert full range to limited range. They do not recommend an RGB color matrix for upload.
Read that again as a practical warning. A file tagged Rec. 2020, with no PQ or HLG transfer, is not “HDR that YouTube will respect.” YouTube says it will pull that kind of file down to 8-bit BT.709. The result can look flat or banded, because the wide color was stored as if it needed 10 bits and then squeezed into 8. People see the upload, assume YouTube ruined a healthy SDR master, and export again at a higher bitrate. The tag was the problem.
Full range versus limited range is the quieter version of the same mistake. Video is usually stored in limited range, where black is not numeric zero and white is not the maximum number. Full range uses the whole scale. If you export full range and a player, or YouTube, treats it as limited, contrast jumps the wrong way. YouTube says it converts full range to limited. A desktop player may not. The same export can look contrasty in one app and washed out in another, with no change to the pixels you think of as “the grade.”
If you want the boring, compatible file, tag it as BT.709, limited range, 8-bit, and make the pixels actually be that picture. Do not leave Rec. 2020 tags on an image you already toned down by eye.
Washed out after a convert that “should not have touched color”
A lot of converters treat color tags as optional. They decode 10-bit HDR, write 8-bit H.264, and forget to say what the new numbers mean. Sometimes they keep the Rec. 2020 label on pixels they have already mapped into ordinary color. Sometimes they strip Dolby Vision and leave the unmapped base layer, which is the gray picture people blame on compression.
Compression can hurt a picture. It does it with blockiness, smeared edges, and banding in a sky, not by repainting a sunset beige. If the converted file is smooth and simply the wrong color, look at the tags before you give it more megabits. Making a file small enough to send is a size job. Do it after the color is honest, or you will ship a small gray file and have nothing left to compare.
The same split applies to the container. MOV, MP4, and WebM are about who can open the file. They are not a color grade. Which format to use still matters, because some players only behave with one of them. Changing the container without deciding what the pixels should look like on an SDR screen will not fix a washed-out sunset.
VideoDownloaderX is a reasonable place to convert or compress a file you already own. It will not invent a tone map you never chose. If the phone clip is HDR and the destination is a normal laptop, decide on an SDR look first, then convert. Hoping the converter “keeps quality” is how the metadata gets dropped.
Banding is the clue that bit depth changed
Skies and walls show this before faces do. If a smooth gradient turns into visible steps after the export, you likely went from 10-bit to 8-bit, or you stretched a narrow range of values across a wider one. Faces can still look acceptable while the sky is striped.
The repair is not a second compress. Go back to the graded picture, add a little noise or dither if your tool has it, and export once. Stacking three 8-bit encodes makes the steps harder. YouTube even notes, on the HDR side, that processing can strip noise that was hiding problems in the shadows, and that denoising before upload is sometimes how you keep a dark area from looking chewed up. The everyday version is simpler. Do not denoise a sky into a perfect ramp and then crush it into 8-bit with no dither.
Stay in SDR on purpose
HDR is a delivery choice, not a moral upgrade. Most places you actually send a file are SDR, and they will stay that way for a while.
WhatsApp, email, a client who watches in a browser on a work laptop, a learning-management page, a TV in an office that never had HDR turned on: those destinations want a normal picture. Converting for WhatsApp, email, and phone players is about size and compatibility. Color belongs in that same decision. An HDR master that looks stunning on your phone will often arrive as a dull, or oddly dark, file once the app recompresses it.
Make the SDR file yourself, while you can still see both versions. Map the highlights down until the sky holds some shape. Lift the face until it survives a dim laptop. Export 8-bit H.264 in an MP4, BT.709, limited range, at the frame size you already chose. Then send that. Keep the HDR original if you might upload it somewhere that can use it later.
Resolution is a separate knob. A washed-out 4K file is not fixed by dropping to 1080p, and a correct 1080p file is not improved by upscaling. Picking 720p, 1080p, or 4K is about detail and storage. Pick it after the color looks right at any size. Check a short test at the size you will deliver, because scaling and color conversion in one pass can band a sky that looked clean in the timeline.
If you actually want HDR on YouTube
YouTube does accept HDR, and it also makes an SDR version for everyone else. Their help page is specific. The picture should be 10-bit or 12-bit. Primaries should be Rec. 2020. The matrix should be Rec. 2020 non-constant luminance. The transfer should be PQ or HLG, which they tie to Rec. 2100. Resolutions they list for HDR upload run from 720p through 2160p. They would rather you use UHD widths than cinema DCI widths. Their example is 3840×1600 rather than 4096×1716. Frame rates are the usual set: 23.976, 24, 25, 29.97, 30, 48, 50, 59.94, and 60. Below 720p, their HDR bitrate table says 480p and 360p are not supported.
Containers they have tested are MOV, MP4, and MKV. The codecs they recommend, because they hold 10-bit and HDR metadata at a sane bitrate, are VP9 Profile 2, AV1, and HEVC. ProRes 422, ProRes 4444, DNxHR HQX, and 10-bit H.264 can work, and YouTube warns that those need very high bitrates, which means a longer upload. For the bitrate targets themselves, their encoding guide’s HDR table is the one to use. At 1080p they list 10 Mbps for 24, 25, or 30 fps, and 15 Mbps for 48, 50, or 60. At 2160p the ranges are 44–56 Mbps and 66–85 Mbps for those same two groups. Those are HDR upload targets, not a suggestion to inflate an SDR phone clip.
The metadata has to say the truth. Transfer PQ or HLG, primaries Rec. 2020, matrix Rec. 2020 non-constant luminance. YouTube says a video is processed as HDR only when those tags are present. PQ files should also carry mastering-display information. If that is missing, they fall back to values for a Sony BVM-X300. That fallback is for a real HDR grade, not a comfort blanket for an unlabeled phone clip.
Two warnings on that page save people from a bad upload. Do not master in DCI P3 and then tag the file as Rec. 2020. YouTube says the picture comes out oversaturated, with hues shifted. And do not run their HDR metadata tool on a video you did not grade with an HDR transfer. They say, in plain language, that the tool will badly distort video if you are wrong, and that plenty of files with “HDR” in the title were never graded that way.
There is a third warning that basic tutorials skip. YouTube’s automatic conversion down to SDR is convenient, and they say it can look good. They also say that on hard clips it might not be perfect. They document a way for a colorist to supply a LUT as a hint. That path is for someone already grading, with a Rec. 709 / Gamma 2.4 monitoring setup and a Rec. 2020 plus ST 2084 conversion LUT. It is not a step a phone clip needs. If you are not grading, let the automatic SDR version happen, or make your own SDR export and upload that instead. Uploading HDR “because the phone said HDR,” and then hoping the automatic map matches the camera roll, is how a sunset goes dull on every non-HDR screen.
A ten-minute check before you send anything
Take thirty seconds of the real clip, not a slate. Include a face if there is one, something white, and the brightest part of the frame.
Watch it on the phone that shot it. Watch the same original in the player your client uses. If those two already disagree, an export will not invent an agreement. Decide which screen is the one that matters. For almost every file you send to another person, the duller screen is the one that matters.
Export that thirty seconds as ordinary SDR. Same frame size, a reasonable bitrate, BT.709 if your tool lets you set it. Do not change the edit. Watch the export on both screens. You are looking for a face that is still a face, a white that is still white, and a sky that still has a shape.
If the short SDR export looks right, export the full piece with those same settings. If it looks gray, do not upload the long file “to see what YouTube does.” Fix the thirty seconds. A bad color transform costs the same amount of time on a two-hour file as it does on a test, except you notice it tomorrow.
What to write down
Keep a one-line note with the export. “SDR, 1080p, BT.709, limited, from the iPhone HDR original.” Future you will not remember which file was the mapped one. The original filename from the camera, IMG_ something, should stay on the camera file. The exported name should say sdr or 709 so you do not upload the wrong one at 11 p.m.
If you use MediaInfo, the lines that settle an argument are color primaries, transfer characteristics, matrix coefficients, bit depth, and color range. Reading the metadata is the general habit. For color, those five lines are the whole habit. A file that says BT.2020 primaries and BT.709 transfer is a contradiction, not a style.
Thumbnails, stills, and the frame you did not mean to freeze
A thumbnail grabbed from an HDR frame often looks dull or oddly dark, because the grabber took one picture and did not apply the phone’s tone map. People then think the whole video is underexposed. Play the video before you judge the still.
When you do need a poster frame, export it from the SDR version you already approved, or export a still after the map. Thumbnails that survive compression is about sharpness and JPEG damage. Color comes first. A sharp thumbnail of the wrong sunset is still the wrong sunset.
The same trap hits a frame you pull into a slide or a document. Paste from the SDR export. A frame grabbed by a player that does not understand the HDR tag will bake the gray into the slide, and no one watching the slide will have the original file to compare.
What usually gets left out
Basic color advice stops at “export in Rec. 709” and a bitrate table. The misses are the ones that waste a day.
The phone picture and the file are not the same view. Until you play the file somewhere else, you have not seen the delivery.
A missing tone map and a dark grade look alike in a hurry and take opposite repairs. The white shirt test is faster than another export preset.
Rec. 2020 pixels without a real HDR transfer are not a secret quality mode. YouTube says it will convert that case to 8-bit BT.709. Tagging a wide space you did not master is how hues shift and skies band.
Full range and limited range can make one file look washed out in one app and harsh in another. Match the range to the player you care about. For a normal upload, limited range is the assumption YouTube will enforce anyway.
An automatic SDR conversion, on YouTube or inside a converter, is allowed to be imperfect. If the clip is hard, highlights against a face, neon against night, a sunset, make the SDR look yourself on a thirty-second test. Do not discover the map on the public upload.
Changing format, resolution, or bitrate without looking at those tags just gives you a new file with the same wrong color. Fix the description and the pixels, then shrink the file if you still need to.
A checklist you can do on the file you have
- Watch the original on the phone and on the screen that will actually be used.
- Separate a dark picture from a picture that only looks dark or pale off the phone.
- Read primaries, transfer, matrix, bit depth, and range.
- If the destination is a message, an email, or a normal browser, export an 8-bit SDR test and approve it on the dull screen.
- If you are uploading real HDR to YouTube, match their tags: 10- or 12-bit, Rec. 2020, PQ or HLG, and a width they accept. Do not tag P3 footage as Rec. 2020.
- Leave the camera original untouched until the mapped copy looks right at the start, the middle, and the brightest shot.
The part worth remembering
Color that changes after an export is usually a translation problem. The phone spoke HDR. The laptop, the converter, or the website answered in ordinary video, and nobody wrote down the dictionary.
Decide which screen has to be right. For a file other people will open, that is almost never the phone that shot it. Make a short SDR test that looks like the picture you mean, tag it as ordinary video, and only then export the full piece or compress it to send. If you truly mastered HDR and the platform can take it, send the tags YouTube actually lists, and expect them to build a separate SDR version that may need a look of its own.
Keep the original. Name the mapped file so you can tell them apart at a glance. The next time a sunset goes beige, you will already know whether you are fixing a grade, a tag, or a player that never learned to read either one.
Sources
- YouTube’s recommended upload encoding settings cover BT.709 for SDR, what happens to unsupported color and full range, and the HDR bitrate table.
- YouTube’s HDR upload guide lists resolution, frame rate, 10- or 12-bit depth, Rec. 2020, PQ or HLG, codecs, the metadata tags, and the warning about automatic SDR conversion.
- MediaInfo shows primaries, transfer, matrix, bit depth, and range on the file you actually have.